1 views
実現する機能
ユーザ名やパスワード等の機密情報をWebブラウザから入力する場合、盗み見られる恐れがあるため、Webサーバー間の通信内容を暗号化するのが一般的です。ここでは、Webサーバーにmod_sslを導入して、URLをhttp://〜ではなく、https://〜でアクセスすることによって、Webサーバー間の通信内容を暗号化できるようにします。自サイトでもメールサーバーやサーバーの管理ツールは暗号化された情報でやりとりをしなくてはなりませんので、導入の必要に迫られ実施しました。
事前準備
※Webサーバー(Apache)が構築済であること。
手順
(1)サーバー用秘密鍵・証明書作成
[root@ufuso ~]# cd /etc/pki/tls/certs/ ← ディレクトリ移動 [root@ufuso certs]# sed -i 's/365/3650/g' Makefile ← サーバー用証明書有効期限を1年から 10年に変更 [root@ufuso certs]# make server.key ← サーバー用秘密鍵の作成 umask 77 ; \ /usr/bin/openssl genrsa -aes128 2048 > server.key Generating RSA private key, 2048 bit long modulus .....................................................................+++ .+++ e is 65537 (0x10001) Enter pass phrase:← パスワードの作成入力(忘れないこと) Verifying - Enter pass phrase:← パスワードの作成再入力 [root@ufuso certs]# openssl rsa -in server.key -out server.key ← サーバー用 秘密鍵からパスワード削除 Enter pass phrase for server.key: ← 上記で応答したパスワードを入力(非表示) writing RSA key [root@ufuso certs]# make server.crt ← サーバー用秘密鍵の作成 umask 77 ; \ /usr/bin/openssl req -utf8 -new -key server.key -x509 -days 3650 -out server.crt -set_serial 0 You are about to be asked to enter information that will be incorporated into your certificate request. What you are about to enter is what is called a Distinguished Name or a DN. There are quite a few fields but you can leave some blank For some fields there will be a default value, If you enter '.', the field will be left blank. ----- Country Name (2 letter code) [XX]:JP ← 国名応答 State or Province Name (full name) []:Okinawa ← 都道府県名応答 Locality Name (eg, city) [Default City]:Naha ← 市区町村名応答 Organization Name (eg, company) [Default Company Ltd]:ShikakiraCS ← 組織名が無ければドメイン名でも入力 Organizational Unit Name (eg, section) []: ← 空のままエンター・キーを押す Common Name (eg, your name or your server's hostname) []:ufuso.dip.jp ← ホストネーム=ドメイン名 Email Address []:webmaster@ufuso.dip.jp ← 管理者のメルアド [root@ufuso certs]# chmod 400 server.* ← アクセス不可設定 |
※パスワードを削除するのは、Webサーバー起動時にパスワードを要求されないようにするため
(2)Webサーバー(httpd)の設定
[root@ufuso ~]# yum -y install mod_ssl ← mod_sslインストール インストール: mod_ssl.x86_64 1:2.4.6-45.el7.centos.4 完了しました! [root@ufuso certs]# vi /etc/httpd/conf.d/ssl.conf ← ApacheSSL設定ファイル編集 # General setup for the virtual host, inherited from global configuration DocumentRoot "/var/www/html" ← #を削除(コメント解除) ServerName ufuso.dip.jp:443 ← #を削除(コメント解除)してホスト名を入力 # Server Certificate: # Point SSLCertificateFile at a PEM encoded certificate. If # the certificate is encrypted, then you will be prompted for a # pass phrase. Note that a kill -HUP will prompt again. A new # certificate can be generated using the genkey(1) command. #SSLCertificateFile /etc/pki/tls/certs/localhost.crt ← #を付けて SSLCertificateFile /etc/pki/tls/certs/server.crt← サーバー用証明書を指定 # Server Private Key: # If the key is not combined with the certificate, use this # directive to point at the key file. Keep in mind that if # you've both a RSA and a DSA private key you can configure # both in parallel (to also allow the use of DSA ciphers, etc.) #SSLCertificateKeyFile /etc/pki/tls/private/localhost.key ← #を付けて SSLCertificateKeyFile /etc/pki/tls/certs/server.key ← サーバー用秘密鍵を指定 |
(4)Apache設定反映
[root@ufuso certs]# systemctl restart httpd ← Apache再起動 |
(5)ポート443番のOPEN
ルーター側の設定でポート443番をOPENする。
※ルーターの設定は各ルーターのマニュアルまたはメーカー別ルーターポート開放手順を参照
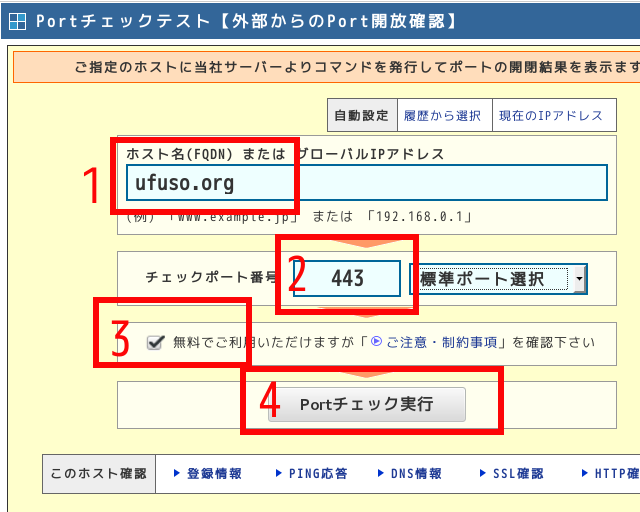
ポートチェック【外部からポート開放確認】で赤枠1の「host名」にサーバー名(例:ufuso.dip.jp)、赤枠2の「port番号」に443と入力して、赤枠3にチェックを入れ、赤枠4の「ポートチェック」ボタン押下。
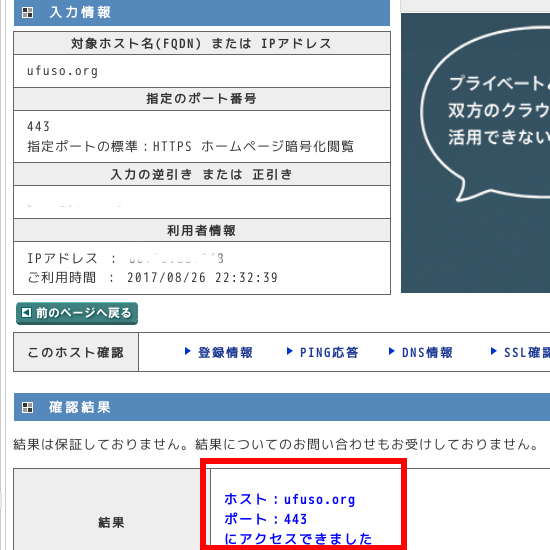
赤枠の「ホスト=ufuso.dip.jp ポート=443 にアクセスできました。」が表示されることを確認。
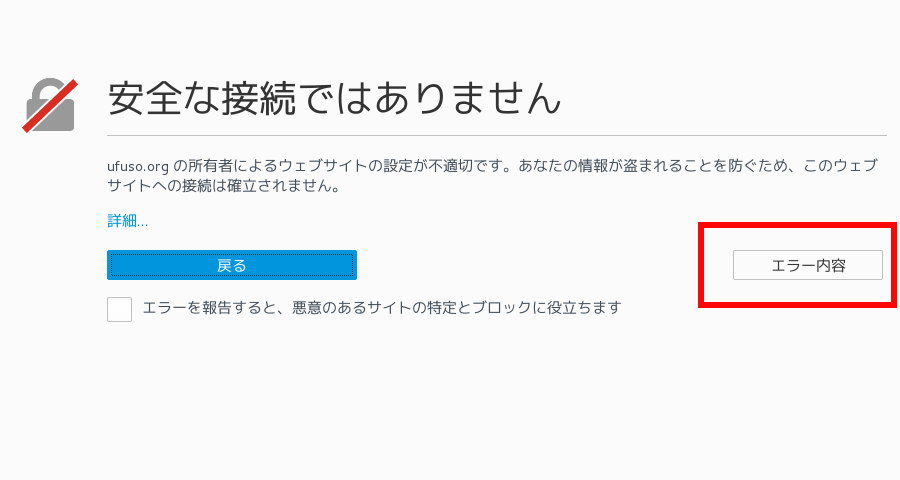
(6)WebサーバーSSL確認
自サイト(例示ではhttps://ufuso.dip.jp/)にアクセスして「セキュリティの警告」ウィンドウが表示されるので、赤枠の「エラー内容」をクリック
表示される赤枠の「例外を追加」をクリック
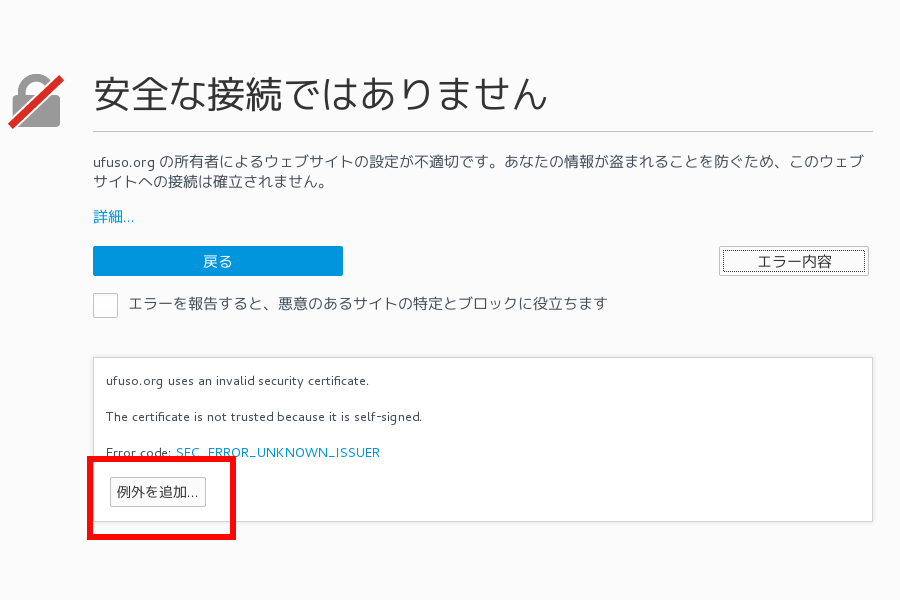
表示される赤枠の「セキュリティ例外を承認」

コメントを残す